| 
Launching DragonDisk for the first time
After starting DragonDisk, by default you can only browse your local drives and folders. To access the full functionalities of DragonDisk, you need to set up your Amazon S3 account.
Setting up Amazon S3 account details
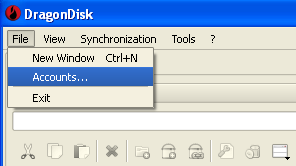
To setup your Amazon S3 account, go to the menu File/Accounts…
A new dialog box is opened:
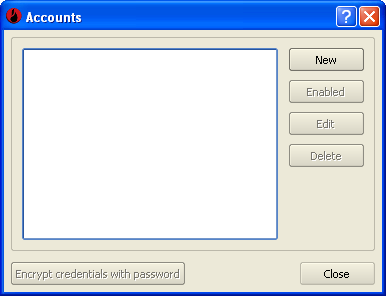
Click on the button New to use your Amazon S3 account with DragonDisk,
and another dialog box is opened:
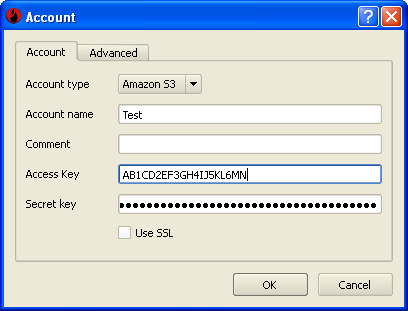
You need to fill at least the fields Account name, Access key and Secret key. Account name
can be any name; it is used only to differentiate your S3 accounts on DragonDisk.
You can access both keys on the section Security Credentials of your
Amazon Web Services account.
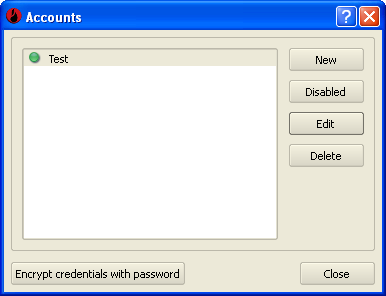
After successfully entering your details, you can see that your account has been added on the list, and if you want to change the name or enter new access keys, just click on Edit to open again the previous dialog box. To manage several Amazon S3 accounts with DragonDisk, repeat the same process. You can disable and delete them as well.
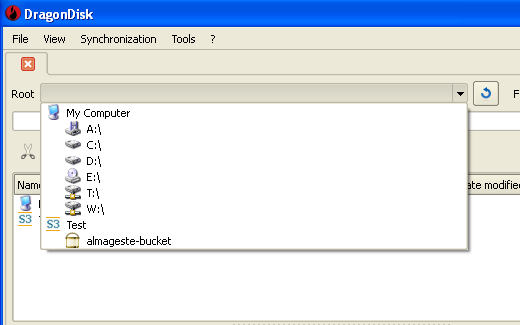
If the details are valid, you can see that S3 has been added on the Root list.

When selecting your S3 as Root, you can browse and edit it.
Create a new bucket
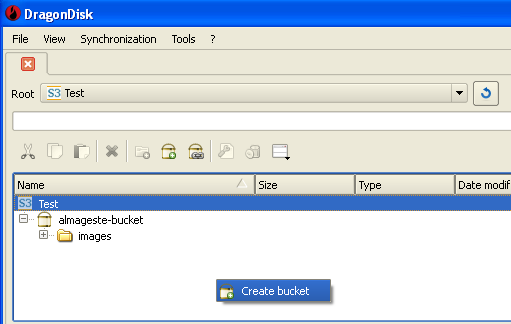
When you select S3 in the tree, you can create a new bucket either with a right click or with the associated button in the toolbar.
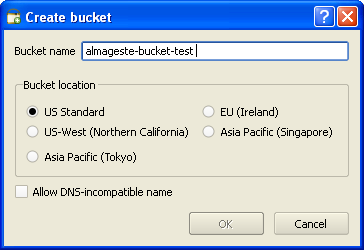
Enter the bucket name in the dialog box that appears; remember that it has to be unique across all existing bucket names in Amazon S3.
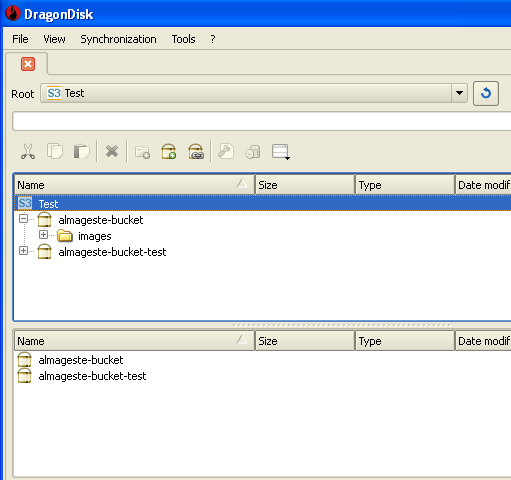
When created, you can see the new bucket in the tree and list.
Options associated to buckets
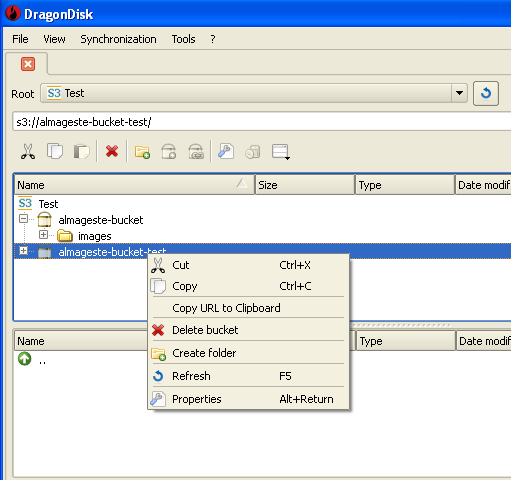
When selecting a bucket in the tree, you can access more options in the context menu or in the toolbar. It is only possible to delete the bucket if empty. Folders can also be directly created inside the bucket.
Options associated to files and folders
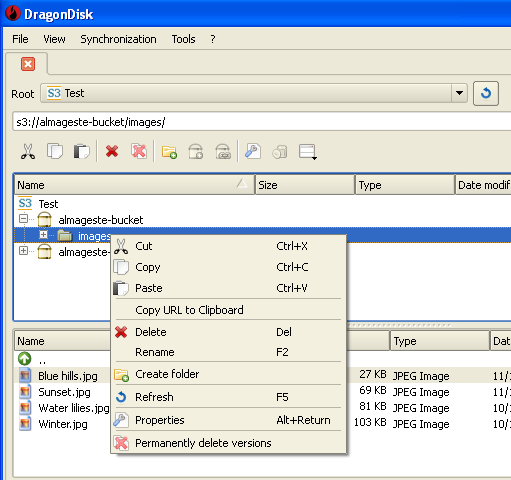
As for buckets, different options are available to files and folders. The traditional hot keys can be used for more efficiency, like Del to delete or F2 to rename the file or folder. Files and folders can be cut, copied and pasted from/to either the file browser of your operating system or DragonDisk, via the context menu, hot keys, toolbar buttons or drag and drop.
You can for example browse the files on your local computer (or another S3 account) on the right side of DragonDisk, or vice-versa, and copy-cut-paste from one side to another.
Synchronization
DragonDisk allows to synchronize the content of two folders, in order to make sure that their content is identical (more or less, depending on different options available).
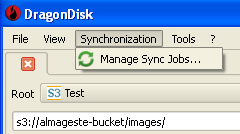
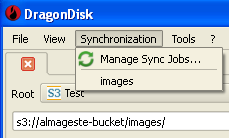
To access this functionality, select Synchronization/Manage Sync Jobs… in the menu.
It opens the following dialog box:
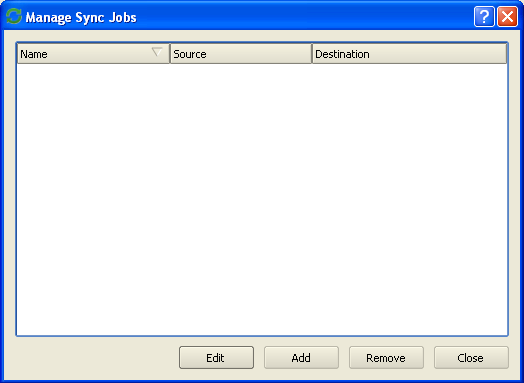
Click on the Add button to create a synchronization. It opens another dialog box:
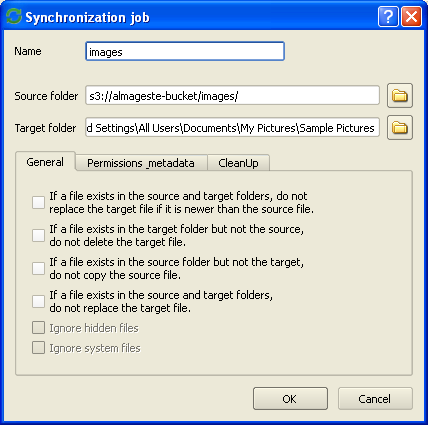
Choose a name to differentiate the different synchronization jobs, browse a source and destination folder.

Once created, you can manage your synchronization job back on the previous dialog box, like editing or removing it, or add a new one.
A new element corresponding to the job created has been added on the menu Synchronization. This synchronization is not automatic, so you have to select this element each time you want to process it. Note that by default the target folder will become as identical as the source folder, so every different element will be deleted without warning.
|
